The Gravity Probe Gyroscope (in a Shader) - Pt. 0
Jan 20, 2021
In the late 1950’s, scientists at NASA and Stanford University devised an experiment to measure two relativistic effects of Earth’s mass and spin. If successful, the experiment would provide empirical validation of Einstein’s general theory of relativity, a tantalising prospect given the weak and insubstantial nature of these phenomena at low masses and energies.
At the heart of the design was a set of precisely calibrated gyroscopes which, when placed in orbit around the Earth, could detect the minute effects of frame-dragging and geodetic distortion caused by the curvature of spacetime. The “drift” due to Earth’s mass was predicted to be so subtle that the experiment had to be engineered to almost impossibly tight tolerances. To prevent noise or wobble dominating the measurements, each gyroscope had be one of the most perfectly round objects ever created by humans. After years of research and several technological leaps, the team finally succeeded in fabricating a small number of fused quartz spheres whose radii varied by no more than a few dozen atoms in any given direction.
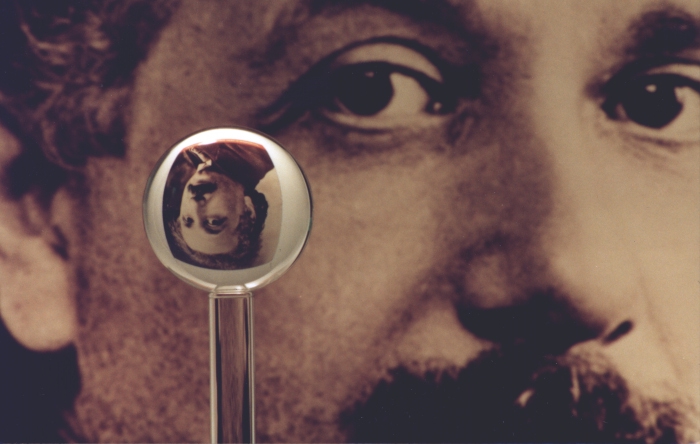
The mark the success of the project, the Stanford team published a photograph of one of the gyroscopes before it was given its metallic coating. The image (shown above) is striking, and depicts a sepia-toned photo of the grandfather of the experiment, Albert Einstein, refracted through the almost perfect quartz sphere as it rests upon its cradle.
I remember seeing this photo for the first time and being immediately captivated. Humans have long looked to geometric structures as an elemental form of beauty, from Plato’s philosophy of idealism to the expressions of the divine in Islamic art throughout the middle east. The gyroscopes in Gravity Probe B were not just the roundest objects created ever created in a lab, but among the most perfectly spherical objects anywhere in the universe. This made the mission as much a homage to symmetry (an elemental property in mathematics) as much as a contribution to physics.
· · ·
The simplicity and pleasing composition of the Gravity Probe photo felt like the perfect inspiration for an experiment. I decided to recreate the scene entirely within Shadertoy, using path tracing to model the optical effects of light refracted through the gyroscope. It was only after the project was well underway that I realised there was a snag: Shadertoy limits developers to a small library of built-in textures; more bespoke patterns must be defined procedurally with mathematical expressions. While it is possible to upload custom images using a local browser extension, I had no means of rendering the picture of Einstein so that everyone else could see it.

Not to be defeated, I considered various ways of defining the scene - photo and all - entirely in code. At its most abstract, procedural modeling is merely the process of finding a compact set of basis functions and operators from which to build a representation of a complex signal. By this logic, an embedded image can be described by just another set of basis coefficients. After nibbling around the edges of the problem and wondering if I could get away with something simple, I decided to start over and rewrite the project from the ground up.
The result is a functional shader that breaks down cleanly into three stages: a lossy image decoder inspired by JPEG2000, a stochastic Monte Carlo path tracer, and a small suite of post-processing effects. Rather than create a facsimile of the original Gravity Probe photo, I chose instead to honour the work of the late Maryam Mirzakhani, an eminently gifted mathematician who, at present, is the only woman to be have been awarded the Fields Medal. Mirzakhani made significant contributions to the field of geometry and her uniquely creative style of problem-solving was an inspiration to many. It feels appropriate to me that her image should appear here.
· · ·
· · ·
The finished shader is embedded above. To start it, hover over the frame and click the ‘play’ button in the lower-left corner. Older mobile devices and machines with legacy graphics cards may struggle or suffer issues with floating-point precision. After compiling and decompressing the texture, the image will gradually clean up over time as the Monte Carlo integrators converge. You can interact with the shader by hitting the Q, W, E, A, S, D, Z, X and C keys, then dragging the mouse to adjust various properties on the camera, scene and post-processor. The full source code and instructions can be found on the Shadertoy project page, including what to do if you see a blank frame or an error message.
I learned a surprising amount during my investigations on this project. So much, in fact, that I plan on devoting the next few posts to doing a detailed breakdown of the steps involved. The discourse will take a gentle meander through the fields of information theory, data compression, harmonic analysis, continuous and linear algebra, and of course, optics. If, like me, you’ve struggled to find a readable description of underflow in arithmetic encoding, or how Stokes’ theorem can be harnessed to speed up light transport, I hope these posts will go some way to demystifying these fascinating (if occasionally abstruse) topics.
The 4-part series will run as follows:
- Pt. 1: Lossy Image Compression and JPEG2000
- Pt. 2: Procedural Geometry and Ray Tracing
- Pt. 3: Light Transport
- Pt. 4: Putting It All Together
I’ll also be making the C++ source for the wavelet codec available on Github so you can try embedding images in your own shaders. If you enjoy reading about this project and would like to reach out or contribute, you can find me on Twitter or by e-mailing me at blog ‘at’ symbol raytracing.co.uk.
Finally, a shout-out to Shadertoy for the amazing service they offer. Please consider supporting them on Patreon if you love what they do and want to help keep their servers running. You can also follow their founders, Pol Jeremias Vila and Iñigo Quilez on Twitter.